

4.0
Owner's of the Onkyo Stereo Receiver Onkyo Stereo Receiver gave it a score of 4.0 out of 5. Here's how the scores stacked up:

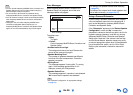


Turning On & Basic Operations
En-25
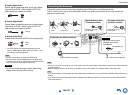
1
Turn on the AV receiver and the connected TV.
On the TV, select the input to which the AV
receiver is connected.
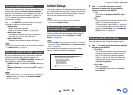
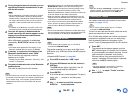
2
Set the speaker setup microphone at the Main
Listening Position , and connect it to the
SETUP MIC jack.
The speaker setting menu appears.
Note
• The on-screen menus appear only on a TV that is
connected to HDMI OUT MAIN. If your TV is
connected to other video outputs, use the AV
receiver’s display when changing settings.
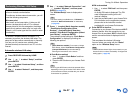
3
When you’ve finished making the settings,
press ENTER.
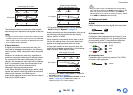
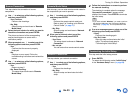
Perform the “2. Speaker Setup” according to your
speaker configuration:
–Speakers Type (Front) (➔ page 55)
–Powered Zone 2 (➔ page 55)
–Surround Back/Front High (➔ page 56)
–Subwoofer (➔ page 56)
If you use a powered subwoofer(s), go to step 4.
If not, go to step 5.
Speaker setup microphone
SETUP MIC jack
MultEQ: Auto Setup
AUDYSSEY
Speakers Type (Front)
Powered Zone 2
Surround Back/Front High
Subwoofer
Normal
No
Surround Back
Yes
4
Adjust the subwoofer volume level to 75 dB,
and then press ENTER.
Test tones are played through the subwoofer.
Use the volume control on the subwoofer.
Note
• If your subwoofer does not have a volume control,
disregard the displayed level and press ENTER to
proceed to the next step.
• If you set the subwoofer’s volume control to its
maximum and the level displayed is lower than 75 dB,
leave the subwoofer’s volume control at its maximum
and press ENTER to proceed to the next step.
5
Use / to select “Audyssey Quick Start” or
“Audyssey MultEQ Full Calibration”, and then
press ENTER.
6
Press ENTER.
Audyssey MultEQ
®
Room Correction and
Speaker Setup starts.
Test tones are played through each speaker as
Audyssey MultEQ Room Correction and Speaker
Setup runs. This process takes a few minutes.
Please refrain from talking during
measurements and do not stand between
speakers and the microphone.
Do not disconnect the speaker setup microphone
during Audyssey MultEQ Room Correction and
Speaker Setup, unless you want to cancel the
setup.
If you select “Audyssey Quick Start”, you will go
to step 9.
7
Place the speaker setup microphone at the
next position, and then press ENTER.
Audyssey MultEQ performs more
measurements. This takes a few minutes.
8
When prompted, repeat step 7.
9
Use / to select an option, and then press
ENTER.
The options are:
`Save:
Save the calculated settings and exit
Audyssey MultEQ Room Correction and
Speaker Setup.
`Cancel:
Cancel Audyssey MultEQ Room Correction
and Speaker Setup.
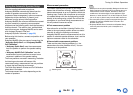
Tip
• You can view the calculated settings for the speaker
configuration, speaker distances, and speaker levels
by using / .
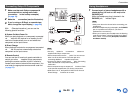
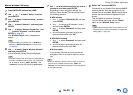
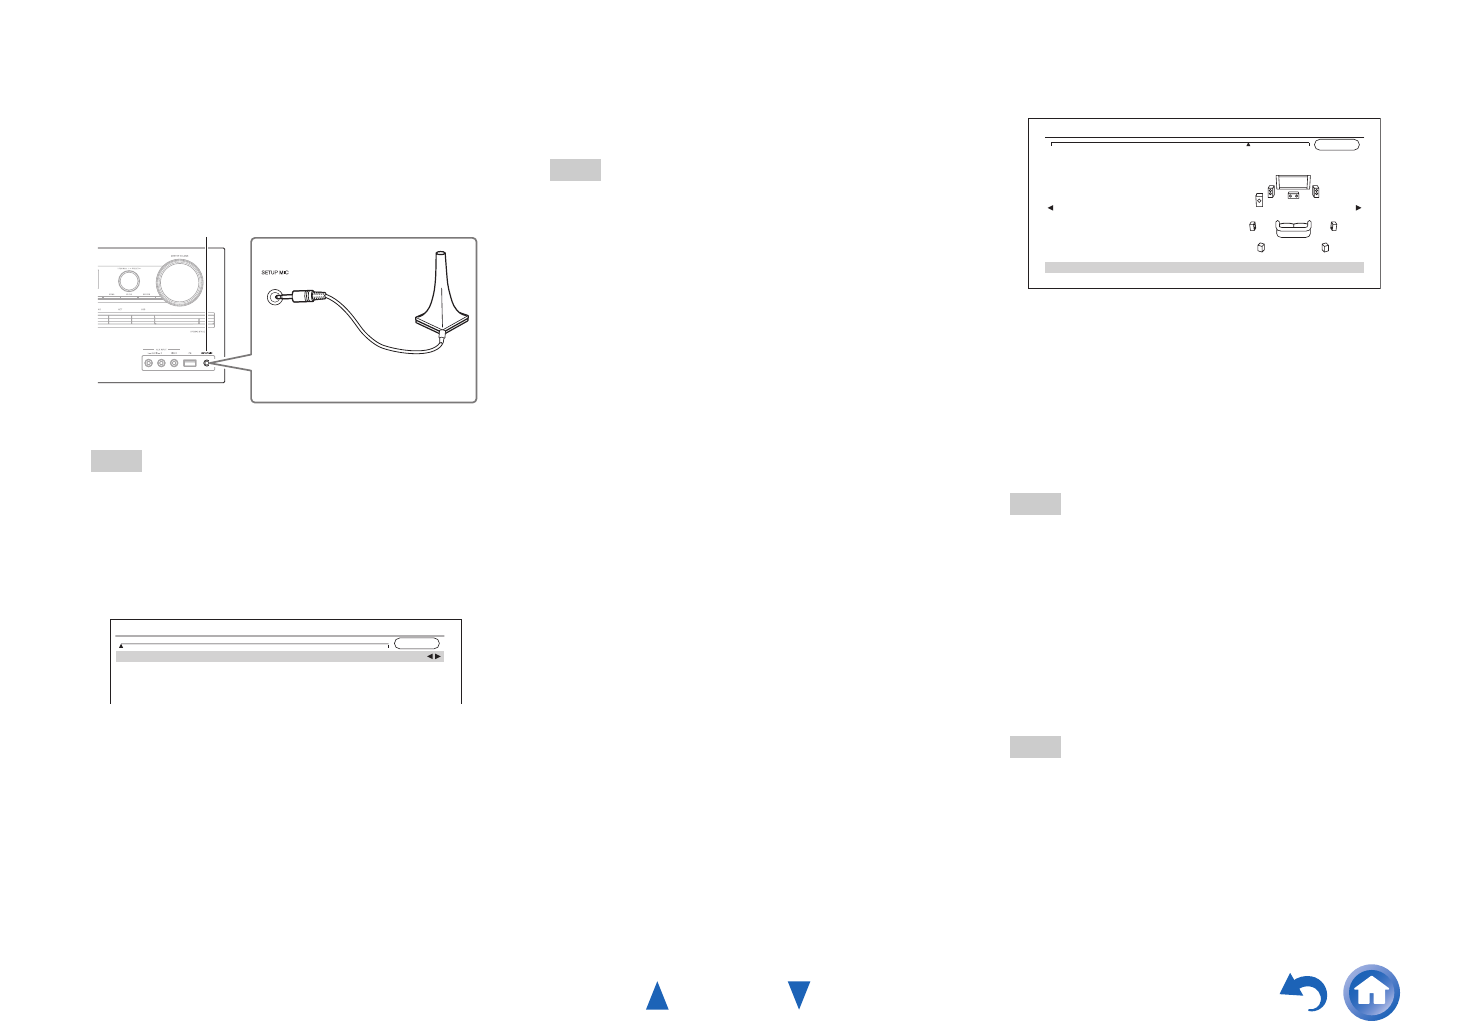
10
Use / to select a target, and use / to
change the setting.
After the results of Audyssey MultEQ have been
saved, the menu will display the “Audyssey”
(➔ page 58), “Dynamic EQ” (➔ page 59),
“Dynamic Volume” (➔ page 59) settings.
Note
• When “Audyssey Quick Start” has been used for
measurement, “Audyssey” cannot be selected.
• These settings are applied to all input selectors.
11
Press ENTER.
12
Disconnect the speaker setup microphone.
Save
Cancel
AUDYSSEY
MultEQ: Auto Setup
-- Review Speaker Configuration --
Subwoofer
Front
Center
Surround
Front High
Surround Back
Surround Back Ch
Yes
100Hz
40Hz
100Hz
None
120Hz
2ch


Find Your Products By Category
Please Login
