

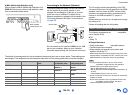
4.0
Owner's of the Onkyo Stereo Receiver Onkyo Stereo Receiver gave it a score of 4.0 out of 5. Here's how the scores stacked up:
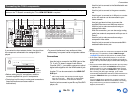
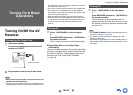


Turning On & Basic Operations
En-23
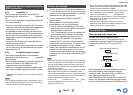
This step checks the connection of source
components.
With this step, you can enter remote control codes for
the components you want to operate.
This step checks your network connection.
This step ends the initial setup process.
Source Connection
1
Use / to select one of the following options,
and then press ENTER.
`Yes, Continue:
Performs the checkings.
`No, Skip:
Skips this step and continues to “Remote
Mode Setup”.
2
Select the input selector for which you want to
check the connection and press ENTER.
The picture and sound of the corresponding
source should appear on screen with a
verification prompt.
3
When prompted, use / to select one of the
following options and then press ENTER.
`Yes:
Confirms that the source is properly
displayed.
`No:
Displays an error report. Follow the
troubleshooting instructions and recheck the
source.
4
Use / to select one of the following options,
and then press ENTER.
`Yes:
Returns to step 2.
`No, Done Checking:
The setup wizard continues to “Remote
Mode Setup”.
Remote Mode Setup
1
Use / to select one of the following options,
and then press ENTER.
`Yes:
Performs the remote control code input.
Refer to step 5 of “Looking up for Remote
Control Codes” (➔ page 71).
`No, Skip:
Skips this step and continues to “Network
Connection”.
2
When you’re finished, select one of the
following options and press ENTER.
`Yes, Done:
The setup wizard continues to “Network
Connection”.
`No, not yet:
You can enter other remote control codes.
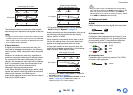
Network Connection
1
Use / to select one of the following options,
and then press ENTER.
`Yes:
Performs the checkings.
`No, Skip:
Skips this step and terminates the initial
setup.
2
Follow the instructions on screen to perform
the network checking.
The checking is complete when the message
“Successfully connected.” appears at the
middle of the screen. Press ENTER to terminate
the initial setup.
Tip
• If you have selected “Wireless”, you need to perform
the wireless LAN setup. See “Performing Wireless
LAN Setup” (➔ page 27). This completes the initial
setup.
3
If an error message appears, select one of the
following options and press ENTER.
`Retry:
Performs the checking again.
`No, Do it Later:
Skips this step and terminates the initial
setup. The setup wizard goes to
“Terminating the Initial Setup”.
Terminating the Initial Setup
1
Press ENTER.
To restart the initial setup, select “Initial Setup”
in the “Hardware Setup” menu (➔ page 68).


Find Your Products By Category
Please Login
