

4.0
Owner's of the Onkyo Stereo Receiver Onkyo Stereo Receiver gave it a score of 4.0 out of 5. Here's how the scores stacked up:

En-48
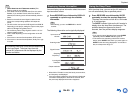
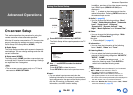
Advanced Operations
On-screen Setup
This section describes the procedure for using the
remote controller unless otherwise specified.
With the AV receiver connected to a TV, there are two
ways of changing the settings on-screen: using the
Quick Setup or the Setup Menu (HOME).
■ Quick Setup
The Quick Setup provides quick access to frequently
used settings. You can change settings and view the
current information.
■ Setup menu (HOME)
The Setup menu (HOME) provides a convenient way
to change the AV receiver’s various settings. Settings
are organized into 9 categories.
Tip
• The on-screen menus appear only on a TV that is
connected to HDMI OUT MAIN.
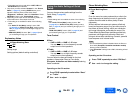
■ Input
*1
`You can select input sources and view the
following information: the name of input selectors,
input assignments, the name of the device paired
with the AV receiver via Bluetooth, radio
information, and ARC function setting.
In addition, previews of the video streams coming
from HDMI inputs (HDMI IN 1/2/3/4/5) are
displayed.
*2
Use / to select an input source and view the
related information. Pressing ENTER switches to
the selected input source.
■ Audio (➔ page 49)
`You can change the following settings: “Bass”,
“Treble”, “Phase Matching Bass”, “Subwoofer
Level”, “Center Level”, “Audyssey”,
“Dynamic EQ”, “Dynamic Volume”, “Late
Night”, “Music Optimizer” and “Cinema Filter”.
■ Video
*3
`You can change the following settings: “Wide
Mode” and “Picture Mode
*4
”.
See also:
• “Picture Adjust” (➔ page 61)
■ Information
*5
`You can view the information of the following
items: “Audio”, “Video” and “Tuner”.
■ Listening Mode
*6
`You can select the listening modes that are
grouped in the following categories: “MOVIE/TV”,
“MUSIC”, “GAME”.
Use / to select the category and / to
select the listening mode. Press ENTER to
switch to the selected listening mode.
Note
*1
“BLUETOOTH” cannot be selected, if you’ve selected
NET or USB as input selector in Zone 2.
*2
• The video preview is not displayed when:
–HDMI IN 6 is the current HDMI input source, or
–No signal is present on the current input source.
• The video of the currently-selected input is displayed on
the main screen, not on a preview thumbnail.
*3
• When the “Monitor Out” setting is set to “Sub”, “Video”
cannot be selected (➔ page 53).
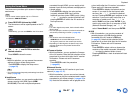
Advanced Operations
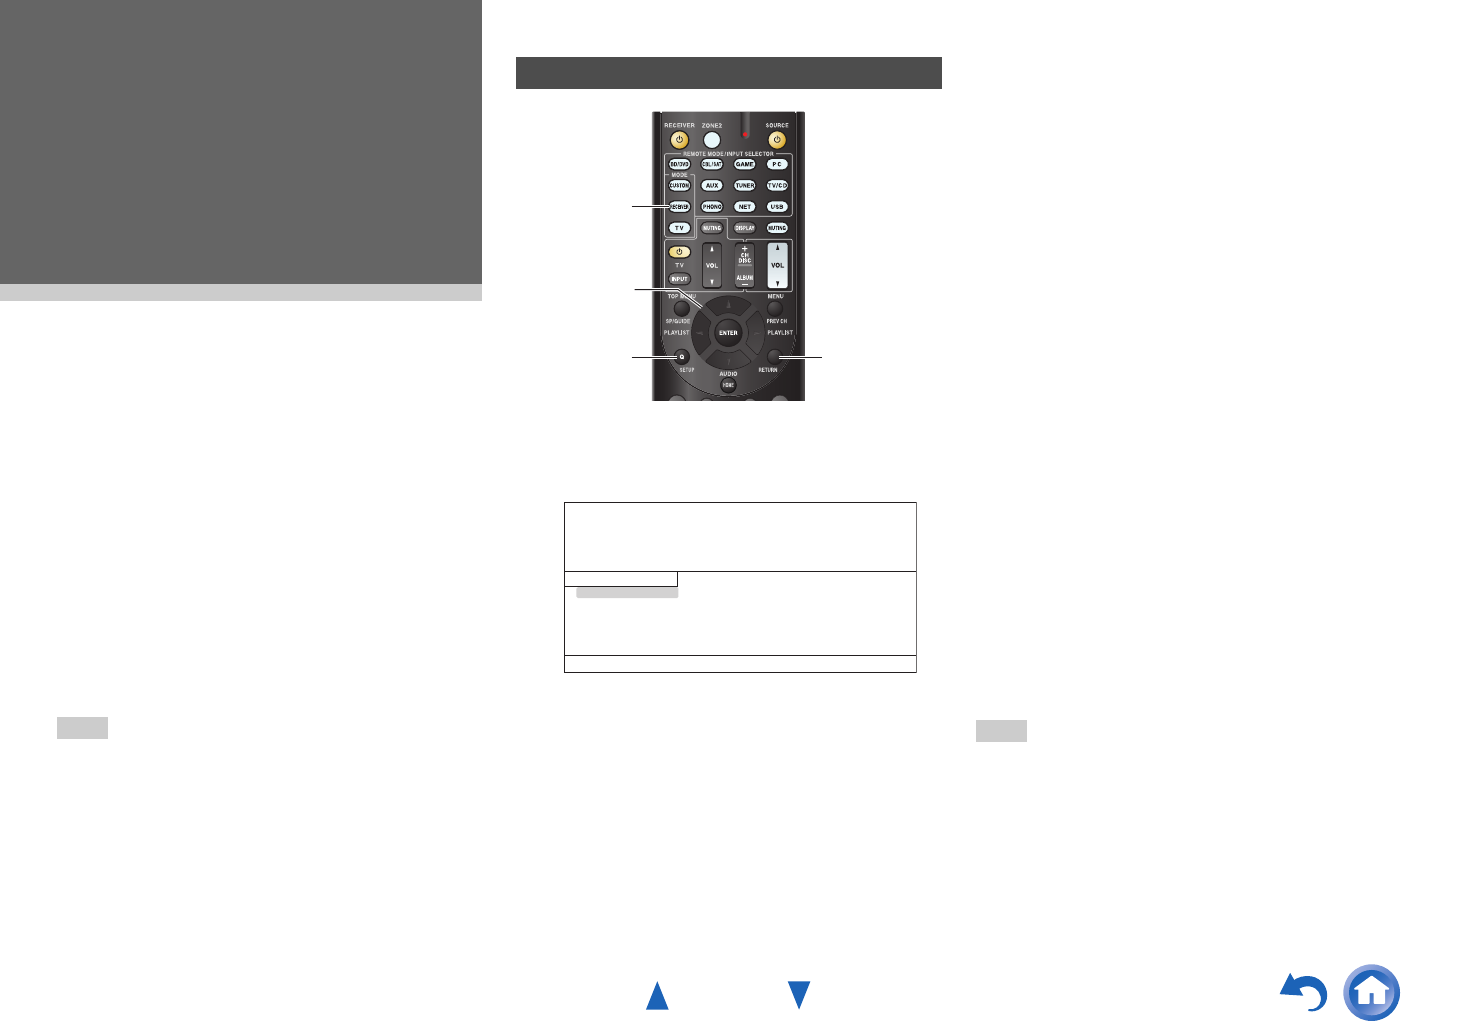
Using the Quick Setup
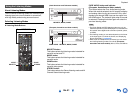
1
Press RECEIVER followed by Q SETUP.
The Quick Setup will be superimposed on the TV
screen.
2
Use / and ENTER to make the desired
selection.
Press Q SETUP to close the menu.
Press RETURN to return to the previous menu.
Q SETUP
RECEIVER
ENTER,
/ / /
RETURN
Input
Audio
Video
Information
Listening Mode
BD/DVD


Find Your Products By Category
Please Login
