

4.0
Owner's of the Onkyo Stereo Receiver Onkyo Stereo Receiver gave it a score of 4.0 out of 5. Here's how the scores stacked up:

Appendix
En-81
■ Can’t access the server or Internet radio
■ Playback stops while listening to music files on
the server
■ Can’t connect to the AV receiver from a Web
browser
■ Can’t access the music files on a USB device
■ Standby power consumption
■ The sound changes when I connect my
headphones
■ The speaker distance cannot be set as required
■ The display doesn’t work
■ How do I change the language of a multiplex
source
■ The functions don’t work
■ The functions System On/Auto Power On and
Direct Change don’t work for components
connected via
■ When performing Automatic Speaker Setup, the
measurement fails and the message “Ambient
noise is too high.” is displayed.
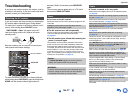
■ The following settings can be made for the
composite video inputs
You must use the buttons on the unit to make these
settings.
On the AV receiver, press the input selector for the
input source that you want to set and the HOME
button simultaneously. While holding down the
input selector button, press HOME until “Video
ATT :On” appears on the AV receiver’s display.
Then, release both buttons. To turn the setting off,
repeat the above process so that “Video ATT :Off”
appears on the AV receiver’s display, and release
the buttons.
• Video Attenuation
This setting can be made for the BD/DVD,
CBL/SAT, GAME, PC or AUX input.
If you have a game console connected to the
composite video input, and the picture isn’t very
clear, you can attenuate the gain.
Video ATT :Off: (default).
Video ATT :On: Gain is reduced by 2 dB.
Music Server and Internet Radio
Certain network service or contents available through this
device may not be accessible in case the service provider
terminates its service.
Check the network connection between the AV receiver
and your router or switch. (➔ page 16)
Make sure that your modem and router are properly
connected, and make sure they are both turned on.
Make sure the server is up and running and compatible
with the AV receiver. (➔ page 89)
Check the “Network”settings. (➔ page 67)
Make sure your server is compatible with the AV receiver.
(➔ page 89)
If you download or copy large files on your computer,
playback may be interrupted. Try closing any unused
programs, use a more powerful computer, or use a
dedicated server.
If the server is serving large music files to several
networked devices simultaneously, the network may
become overloaded and playback may be interrupted.
Reduce the number of playback devices on the network,
upgrade your network, or use a switch instead of a hub.
If you’re using DHCP, your router may not always allocate
the same IP address to the AV receiver, so if you find that
you can’t connect to a server or Internet radio station,
recheck the AV receiver’s IP address on the “Network”
screen. (➔ page 67)
Check the “Network” settings. (➔ page 67)
USB Device Playback
Make sure the USB device is plugged in properly.
The AV receiver supports USB devices that support the
USB mass storage device class. However, playback may
not be possible with some USB devices even if they
conform to the USB mass storage device class.
(➔ page 89)
Depending on the type of format, the playback from a USB
device may not be performed normally. Check the type of
the file formats that is supported. (➔ page 90)
USB memory devices with security functions cannot be
played.
Others
In the following cases, the power consumption in standby
mode may reach up to a maximum of 8.6 W:
–The “HDMI CEC (RIHD)” setting is set to “On”.
(Depending on the TV status, the AV receiver will enter
standby mode as usual.)
–The “HDMI Through” setting is set to other than “Off”.
–The “Network Standby” setting is set to “On”.
(➔ pages 64, 65, 67)
If an MHL-enabled mobile device connected to HDMI IN 1
is charged, the power consumption in standby mode will
increase than the figure above. (➔ page 16)
When a pair of headphones is connected, the listening
mode is set to Stereo, unless it’s already set to Stereo,
Mono, Direct, or Pure Audio (European, Australian and
Asian models).
The values entered may be automatically adjusted with
values best-suited for your home theater.
The display is turned off when the Pure Audio (European,
Australian and Asian models) listening mode is selected.
Use the “Multiplex” setting in the “Audio Adjust” menu to
select “Main” or “Sub”. (➔ page 57)
To use , you must make an connection and an
analog audio connection (RCA) between the component
and AV receiver, even if they are connected digitally.
(➔ page 20)
While Zone 2 is selected, the functions don’t work.
(➔ page 20)
These functions don’t work when Zone 2 is turned on.
(➔ page 20)
This can be caused by a malfunction in your speaker unit.
Check if the unit produces normal sounds.


Find Your Products By Category
Please Login
