
0
Owner's of the Onkyo Stereo Receiver AV Receiver gave it a score of 0 out of 5. Here's how the scores stacked up:

Advanced Operations
En-69
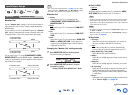
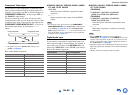
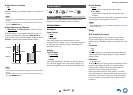
Speaker Distance
Here you can specify the distance from each speaker to the
listening position so that the sound from each speaker
arrives at the listener’s ears as the sound designer intended.
You can set the distances for front speakers A and front
speakers B independently. The other speakers (i.e.,
subwoofer, center, surround, surround back and front high)
use the same distance settings for Speakers A and
Speakers B.
■ Unit
(North American models)
`feet
:
Distances can be set in feet. Range: 0.2ft to 30.0ft in
0.2 foot steps.
`meters:
Distances can be set in meters. Range: 0.06m to
9.00m in 0.06 meter steps.
(European models)
`feet:
Distances can be set in feet. Range: 0.2ft to 60.0ft in
0.2 foot steps.
`meters
:
Distances can be set in meters. Range: 0.06m to
18.00m in 0.06 meter steps.
■ Left, Front Wide Left, Front High Left, Center,
Front High Right, Front Wide Right, Right,
Surround Right, Surround Back Right, Surround
Back Left, Surround Left, Subwoofer 1,
Subwoofer 2
*1
`Specify the distance from each speaker to your
listening position.
Note
• Speakers that you set to “No” or “None” in “Speaker
Configuration” cannot be selected (➔ page 67).
• Speakers B cannot be selected if “Speakers Type(Front B)” is
set to “No” (➔ page 66).
• When the “Powered Zone 3” setting is set to “Yes”
(➔ page 66) while Powered Zone 2 is enabled (➔ page 89),
the surround back speakers cannot be used.
*1
If the “Subwoofer” setting is set to “1ch”, this setting cannot
be selected (➔ page 67).
Level Calibration
Here you can adjust the level of each speaker with the
built-in test tone so that the volume of each speaker is the
same at the listening position.
You can set the levels of front speakers A and front
speakers B independently. The other speakers (i.e.,
subwoofer, center, surround, surround back and front high)
use the same level settings for Speakers A and Speakers B.
■ Left, Front Wide Left, Front High Left, Center
*1
,
Front High Right, Front Wide Right, Right,
Surround Right, Surround Back Right, Surround
Back Left, Surround Left
`–12.0dB to 0.0dB to +12.0dB in 0.5 dB steps.
■ Subwoofer 1
*1
, Subwoofer 2
*1*2
`–15.0dB to 0.0dB to +12.0dB in 0.5 dB steps.
Note
• These settings cannot be calibrated when the AV receiver is
muted.
• Speakers that you set to “No” or “None” in “Speaker
Configuration” cannot be selected (➔ page 67).
• When the “Powered Zone 3” setting is set to “Yes”
(➔ page 66) while Powered Zone 2 is enabled (➔ page 89),
the surround back speakers cannot be used.
• The test tone is output at the standard level for THX, which is
0 dB (absolute volume setting 82). If you normally listen at
volume settings below this, be careful because the test tone will
be much louder.
• Speakers B cannot be selected if “Speakers Type(Front B)” is
set to “No” (➔ page 66).
*1
For the center speaker and subwoofer, the level settings made
by using the Quick Setup are saved in this menu (➔ page 59).
*2
If the “Subwoofer” setting is set to “1ch”, this setting cannot
be selected (➔ page 67).
Tip
• If you’re using a handheld sound level meter, adjust the level of
each speaker so that it reads 75 dB SPL at the listening position,
measured with C-weighting and slow reading.
This setting is set automatically by
Audyssey MultEQ
®
XT32 Room Correction and
Speaker Setup function (➔ page 42). For Speakers B,
you need to change the settings manually.
This setting is set automatically by
Audyssey MultEQ XT32 Room Correction and Speaker
Setup function (➔ page 42). For Speakers B, you need
to change the settings manually.


Find Your Products By Category
Please Login
