
0
Owner's of the Onkyo Stereo Amplifier A-5VL gave it a score of 0 out of 5. Here's how the scores stacked up:
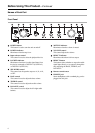
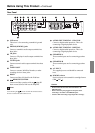

Connecting to Other Devices—Continued
13
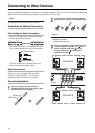
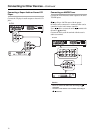
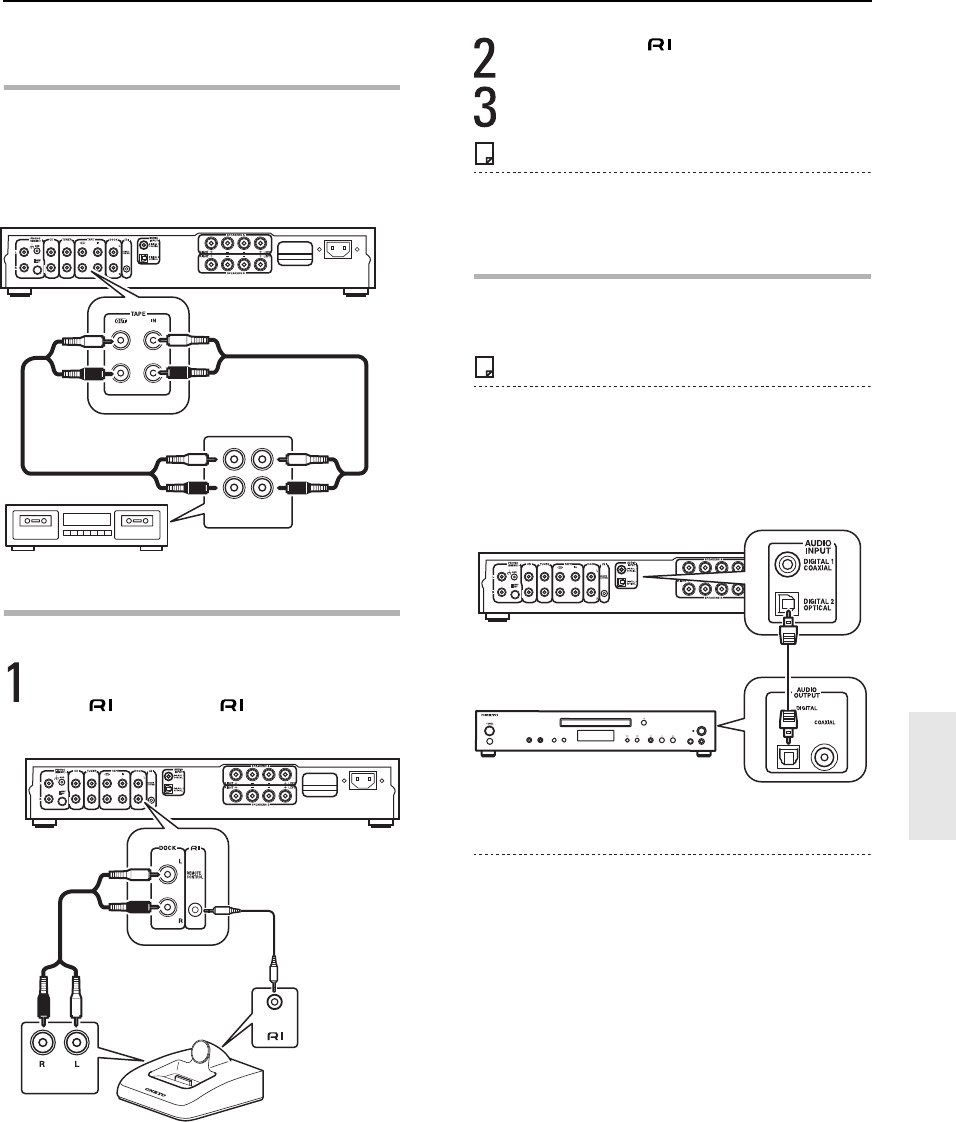
Connecting a Cassette or MiniDisc
Recorder
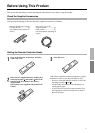
Connect the audio outputs of the cassette or MiniDisc
Recorder (PLAY) to the unit's TAPE IN jacks.
Connect the audio inputs of the cassette or MiniDisc
Recorder (REC) to the unit's TAPE OUT jacks.
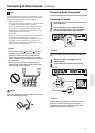
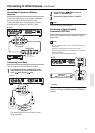
Connecting an RI Dock
You can connect an Onkyo RI dock to the unit.
Connect the RI dock's AUDIO OUT to the
unit's DOCK jack. Connect the RI dock and
unit's jacks via the cable.
(The drawing shows a DS-A3 Onkyo RI dock
being connected.)
Set the RI dock's MODE selector to
"HDD" or "HDD/DOCK".
Set the unit's input selector to "DOCK".
Notes
Refer to the RI dock's manual for details.
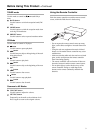
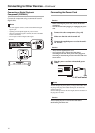
Connecting a Digital Playback
Component (OPTICAL)
Connect the component using a commercial optical
digital cable.
Notes
- The unit supports 16/24 bit, 32/44.1/48/96 kHz PCM signal
digital input.
- Inputting an incompatible signal may result in noise.
- When an unsupported signal is detected, the unit's LOCKED
indicator illuminates.
- Do not input a DTS-CD digital audio signal.
Caution
Plug optical digital cables straight in and out. Plugging them
in and out at an angle can damage the inlet of the OPTICAL
terminal.
(IN) (OUT)
REC PLAY
L
R
L
R
A-5VL
A-5VL
----
OUTPUT
A-5VL


Find Your Products By Category
Please Login
