
0
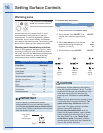
Owner's of the Electrolux Range Electrolux Electric Range gave it a score of 0 out of 5. Here's how the scores stacked up:

13
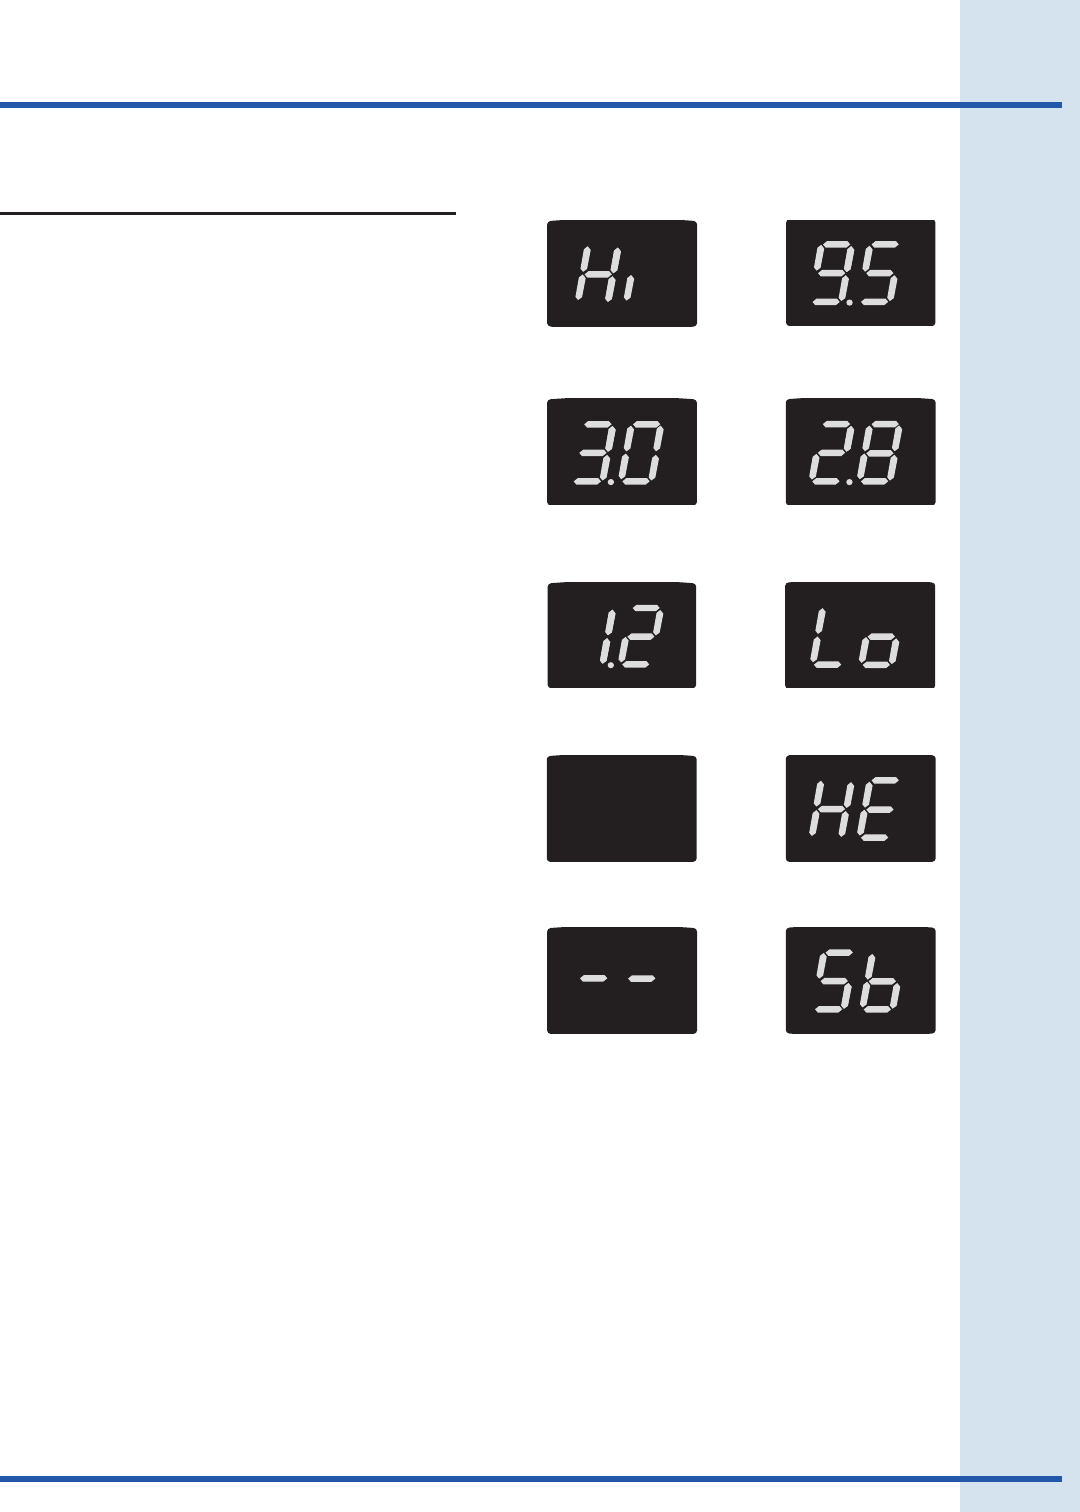
Cooktop power level settings
Fig. 1
Fig. 2
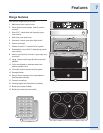
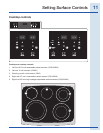
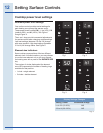
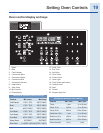
Cooktop element display windows
The control panel provides four digital display
windows showing power levels for the cooking
zones on the cooktop. Power levels are monitored
using the window displays and controlled with the
corresponding control touch keypads.
The dual radiant heating elements provide two
different element sizes. This feature provides
additional heating area choices to match the size of
the cookware you are using.
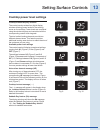
Available power level settings
The control panel will display power level settings
ranging from Hi ( Figure 1) to Lo (Figure 6) and
OFF (Figure 7).
The settings between 9.5 (Figure 2) and 3.0
(Figure 3) decrease and increase in increments of
0.5 (1/2). Settings between 2.8 (Figure 4) and 1.2
(Figure 5) are Simmer settings which decrease
and increase in increments of 0.2 to Lo (Figure 6)
for more precise settings at lower heat levels.
Hot surface element message (HE)
After turning any of these elements OFF, the
cooktop will remain HOT for some time. The
corresponding HE message (hot element, Figure
8) will remain ON until that element position on the
cooktop has cooled. The display will turn off when
cool (Figure 7).
Cooktop lockout message ( - - )
The (- -) message will appear in the display when
the cooktop lockout feature is active (Figure 9).
Refer to the cooktop lockout instructions for more
detailed information.
Sabbath Day feature (Sb) message
The display windows will show the Sb message
when the Sabbath Day feature is active (Figure
10). See "Setting the Sabbath Day feature"
section for detailed instructions.
Fig. 3
Fig. 4
Fig. 5
Fig. 6
Fig. 7
Fig. 8
Fig. 9
Fig. 10
Setting Surface Controls


Find Your Products By Category
Please Login
